.png)


Easily build Flutter apps in FlutterFlow without knowing code.
As an agency we often have clients ask us to export our designs into code, while there are some good tools out there, most of them are clunky and produce code that is a little hard to understand or is structured poorly. The main reason for this is that design tools don’t function the way code functions. Design tools like Sketch, Figma, Adobe XD are meant for creativity, allowing vector drawings, gradients, drop shadows, crazy text styling etc.
Although having the ability to express your design creativity is awesome — converting that to code is messy.
It’s for this reason we love the fact that we can now use Flutterflow to implement our designs (not convert via a plugin). And yes, this takes time but in contrast to coding it all by hand we can put screens into Flutterflow almost as fast as we can design them in Sketch. And in addition to that our front end code can be exported in a clean format that can be added onto and extended by other developers.
Simple & Intuitive Interface
Coming from a design background; mostly working in Sketch or Figma for designing interfaces,getting used to a tool that uses code can be scary. We have found some awesome tutorials on transitioning to development for designers on Designcode.io, @mengto does a great job of explaining coding concepts in a way designers can understand. Switching to Flutterflow required a little bit of introduction but a simple youtube video can solve the main problems we faced when we first started in Flutterflow. Below are some tips we wanted to pass on to you looking to dive into Flutterflow.
Think “Build” instead of “Design”
When putting your interfaces into Flutterflow this is an important function that has really helped us. You have to build the structure and once you follow the structure, designing becomes super easy.
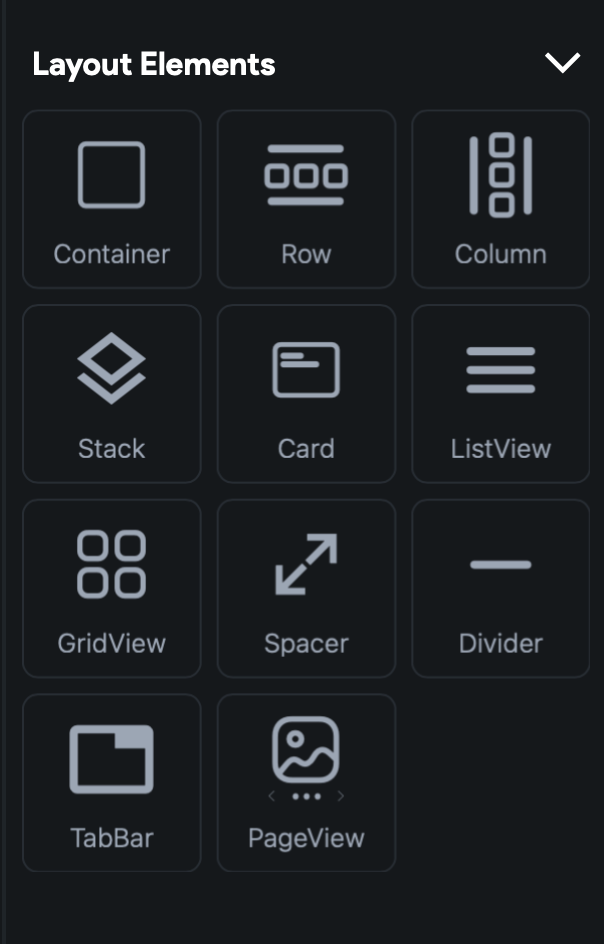
1. Use columns & rows to help maintain structure of your widgets, if you have developed using bootstrap or any other framework on the web. You will be used to using “rows” & “columns” but there is one caveat.
In Flutter you use Columns first and Rows inside columns: columns allow you to stack widgets vertically and rows allow you to stack widgets horizontally.
This one piece of knowledge will allow you go from being frustrated to being able to build amazing interfaces.
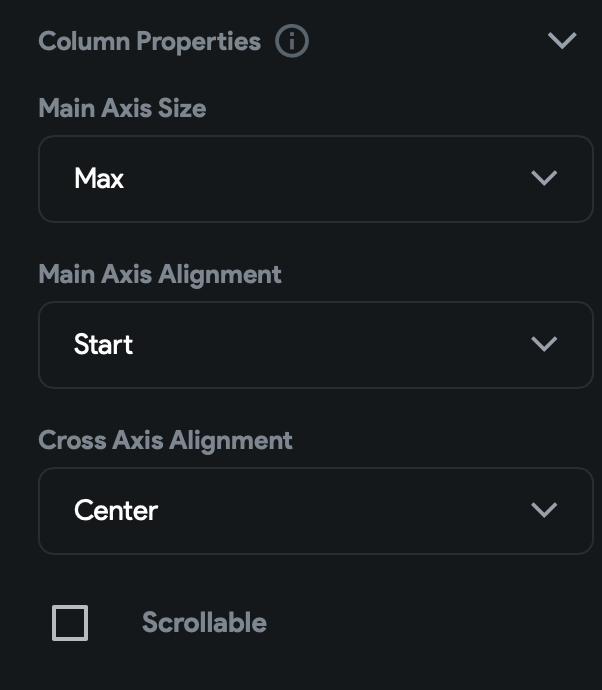
2. Use the Main & Cross axis controllers to control layout of right, left & center as well as top middle bottom. Using these controls instead of padding to control centering of content is much more responsive for different screen sizes.
3. Use containers in order to extend your designs. Containers allow you to add box styling for a variety of options including; background image, gradient & drop shadows.
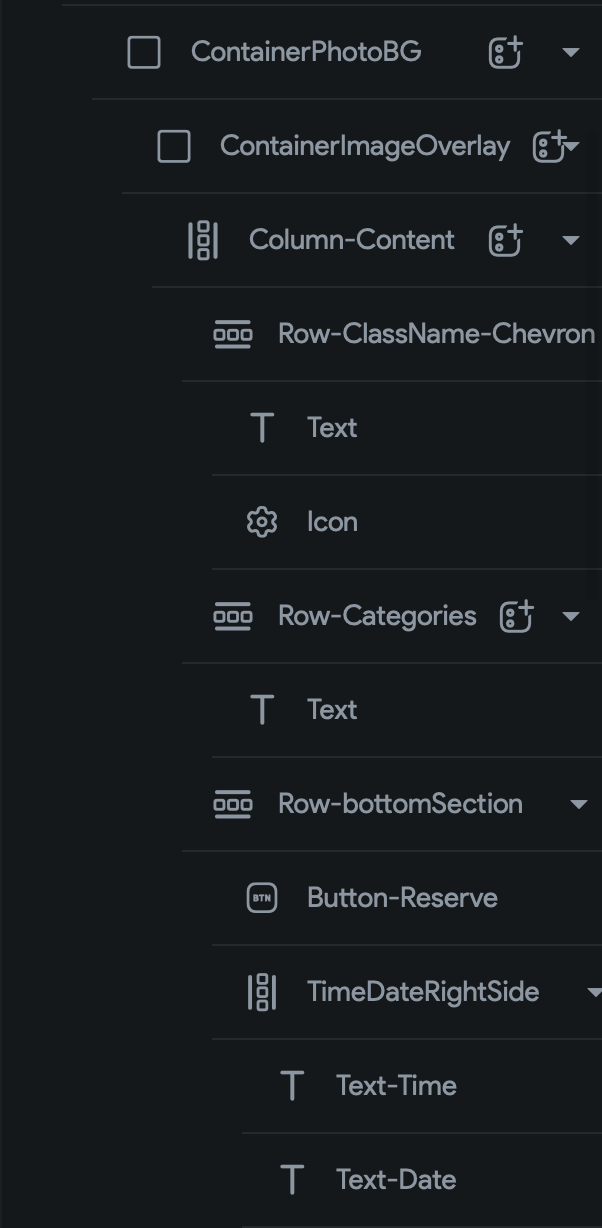
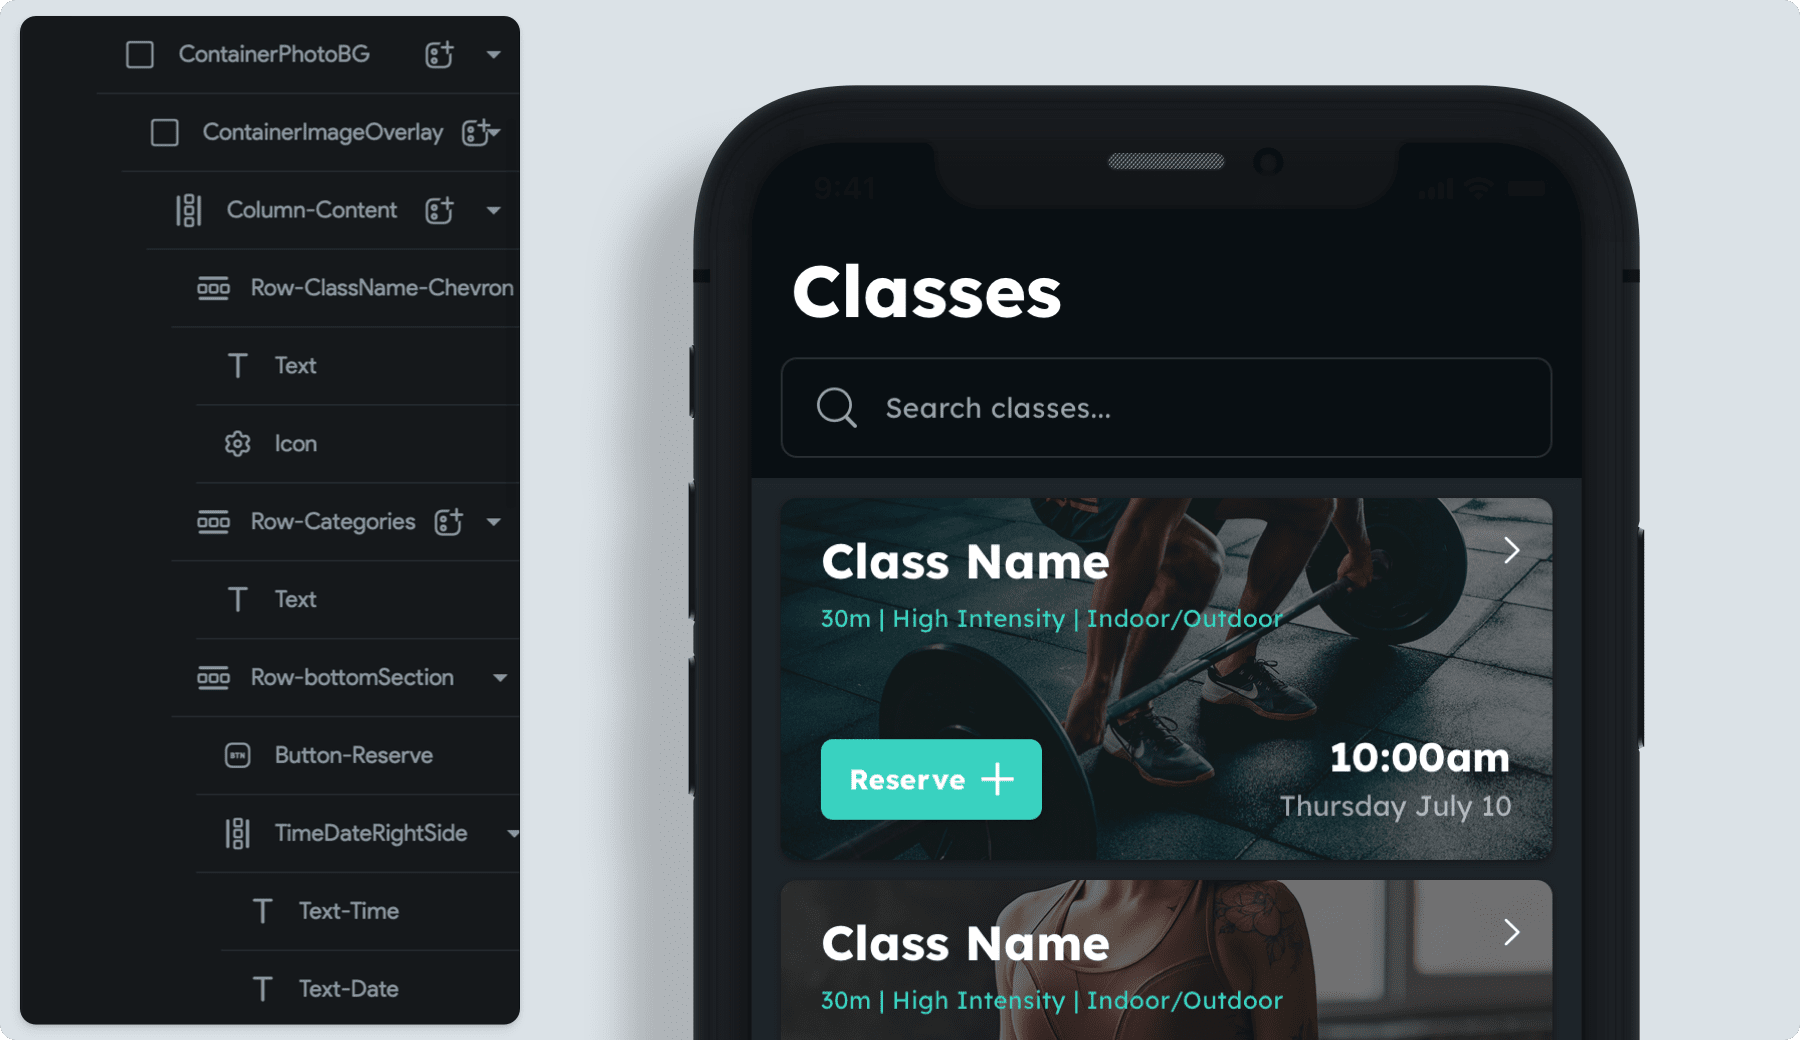
1. You can see that we have used a container as the card background in the image below; this allowed us to use a soft drop-shadow & background image for the card.
2. We then added another container within the main container, this allowed us to do an opaque overlay on the image background.
3. You will always want to add a column to a widget that you want to add other widgets too, this provides the structure that you need to get the card below and allows you to design more intriguing UIs.
4. We then add rows for each set of content that we are adding to the card design. The first row contains the Class Name & Chevron Icon, the second row contains our green text “30m | High Intensity…” We then add a row for the bottom section; within this row we add a button on the left and a column on the right that allows us to add the two text elements stacked on top of one another. In order to get the bottom section to float to the bottom, we “expanded” that row and set the cross axis.
4. Make sure to utilize theme styling. And while you are doing this; add additional colors so that you can apply the colors easily in your designs; this is how we typically set up our colors. Currently you aren’t able to add dark mode / light mode but we have heard it is in the backlog for the Flutterflow team, and we look forward to that feature. You can also set up your typography hierarchy in the project settings.

Sharing Designs in Flutterflow
For feedback & collaboration you can’t beat Flutterflows collaboration — Whether it is inviting team members to your project to help you build your app or sharing your project with stakeholders doing this in Flutterflow is super easy! But this requires a post all to itself, which we will spend time on how we share our projects with other developers and stakeholders.

Conclusion
Going from design to code has never been easier, building beautiful apps that allow for fully capable production apps as well as interactive prototypes is incredible, Flutterflow has allowed us to cut down the design to development gap that has existed in previous projects, it has also allowed us to better work with development teams and push products out faster. In addition, it allowed us to bring some development work in house instead of having to work with development teams for frontend design.
We hope you enjoyed this summary — we will be sharing more and more posts about how we use Flutterflow and the features that are released by Flutterflow.